Dental implant surgery is an expensive (but worth-it) investment in your oral health and one that you hope that will last forever. With more and more people opting for dental implants vs. other missing tooth replacements, the best way to clean dental implants comes up often by my patients in my dental chair.
The best way to clean, maintain and care for dental implants is to see your dental professional regularly, floss daily, brush with an electric toothbrush twice daily and use implant-specific tools such as; Waterpik, expanding floss, Sulcabrush, end-tuft brush, and a coated interproximal brush.
Dental implants need a little more tender love and care than natural teeth (that I go over in this post), and taking good care of them will prevent them from failing and make them last a long time.
In this post, I go over all the ways to clean, maintain and care for dental implants that I discuss with my own patients who are thinking of getting dental implants or those who already have them.
Why keeping dental implants clean is so important
I have had a couple of patients who did not take care of their dental implants and have had them removed. I never want to see my patients losing their costly investment over something that could have been prevented.
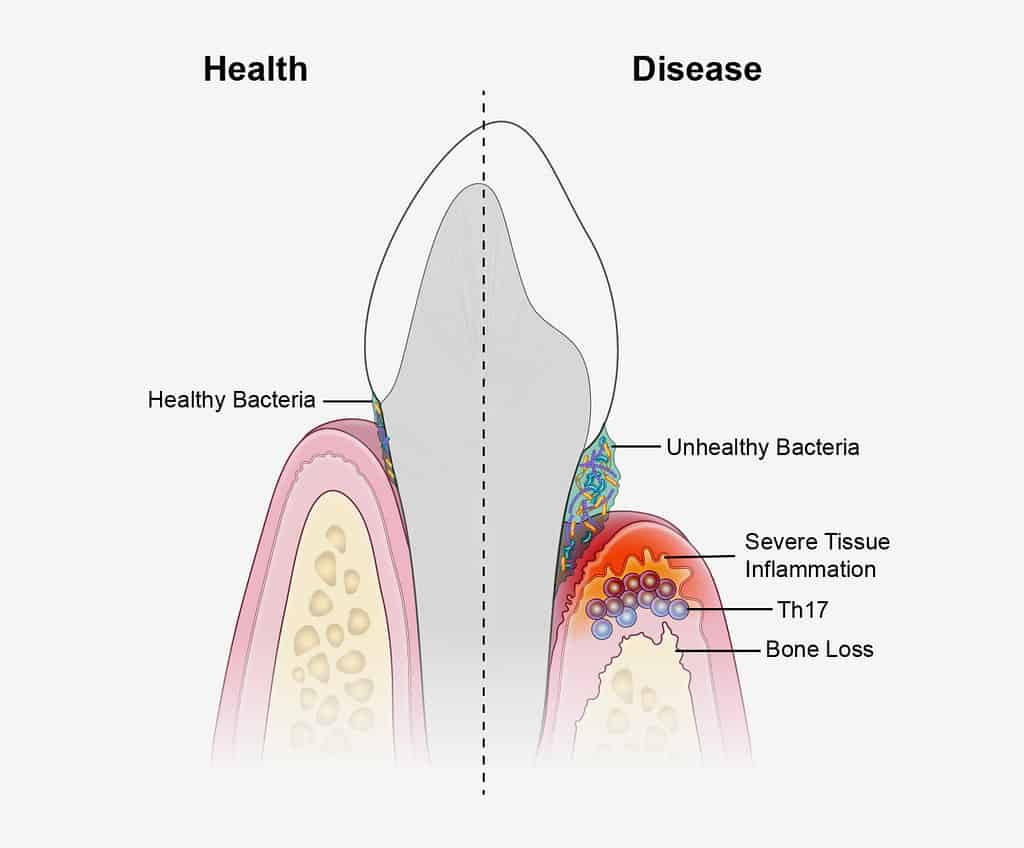
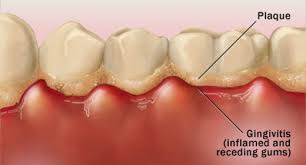
The reason why dental hygiene and oral health are so important is that it not only keeps the tissues in our mouths (teeth, gums and bone) healthy but in turn contributes to our overall total health.
Keeping the gums healthy is directly related to the longevity of our teeth, as well as dental implants.
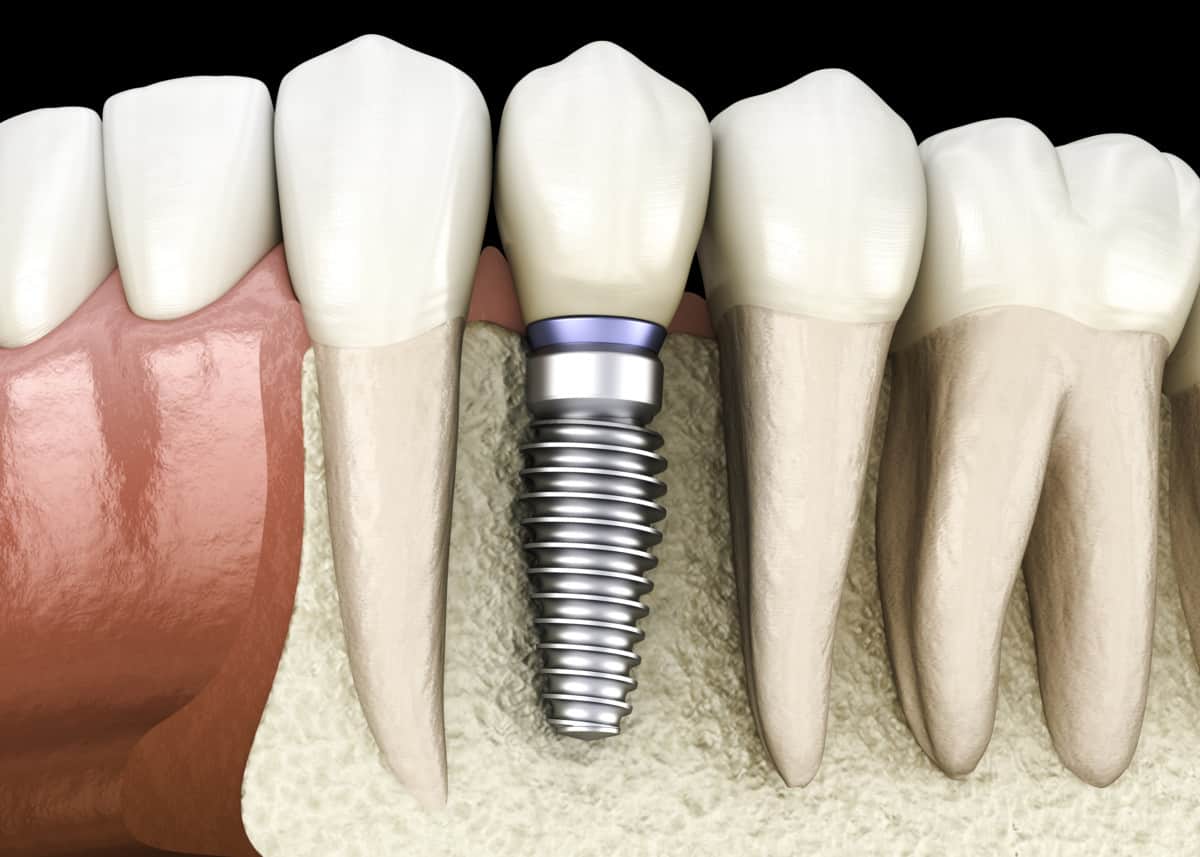
Dental implants can fail due to gum disease (called peri-implantitis), as the bacteria in the mouth can cause inflammation in the gum tissue and bone surrounding the implant.
When gingivitis (called perio-mucositis when pertaining to dental implants) is not rectified, the chronic inflammation and excess bad bacteria start to travel into the bone surrounding the implant and results in the bone being destructed and causing bone loss.
Once the bone is gone, it’s gone. There is no going back.
This destructive inflammatory situation is hard to stop once it has started so prevention is key to having your implants last a long time.
Read Now: Can You Replace a Dental Implant Crown? Hygienist Explains.
How to clean dental implants with a Waterpik
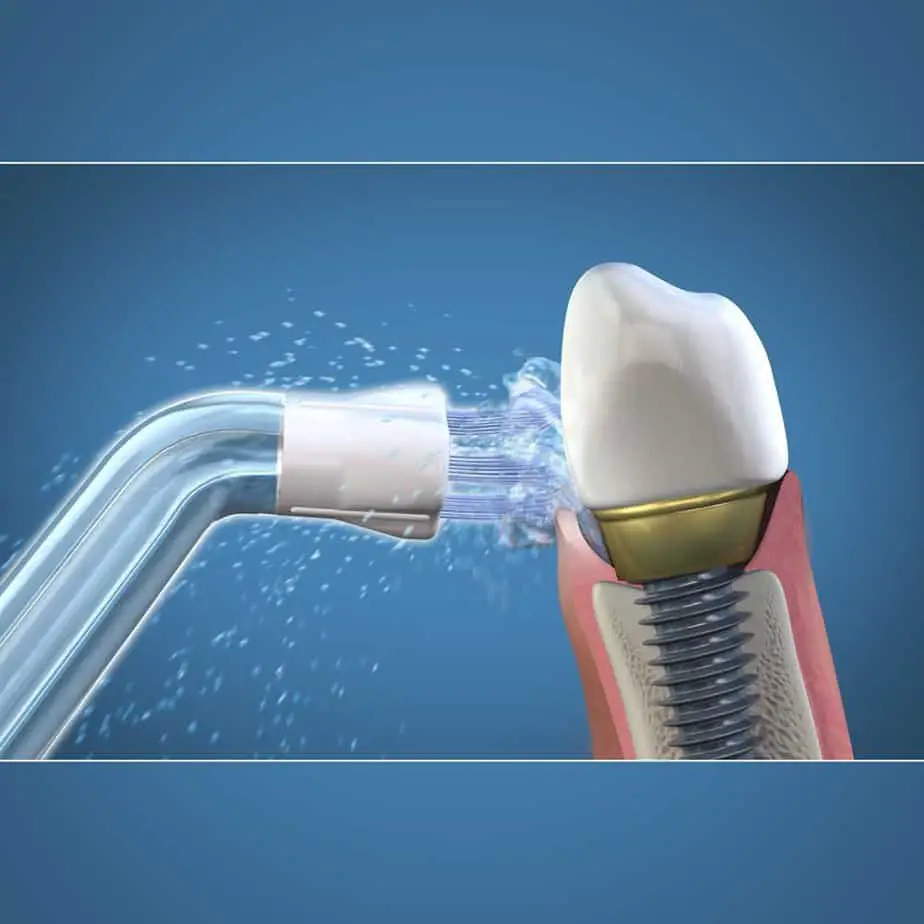
In my opinion, Waterpiks are one of the most underrated dental tools on the market.
It is important to note that using a Waterpik does not replace flossing and brushing, however, they offer benefits that flossing and brushing do not have.
To clean your dental implant with the Waterpik, you will want to use the implant tip called the Plaque Seeker.
Place the tip at a 45-degree angle at the gumline of the implant. You will want to use a gentle sweeping motion back and forth to sweep away any plaque and food debris.
Take about 5-10 seconds per implant to make sure you are getting all the surfaces. This time allows the water to flush away bacteria, food debris and plaque.
You can find the link to the plaque seeker tip on my implant resource page if you are interested in purchasing them, or you can click the image below.
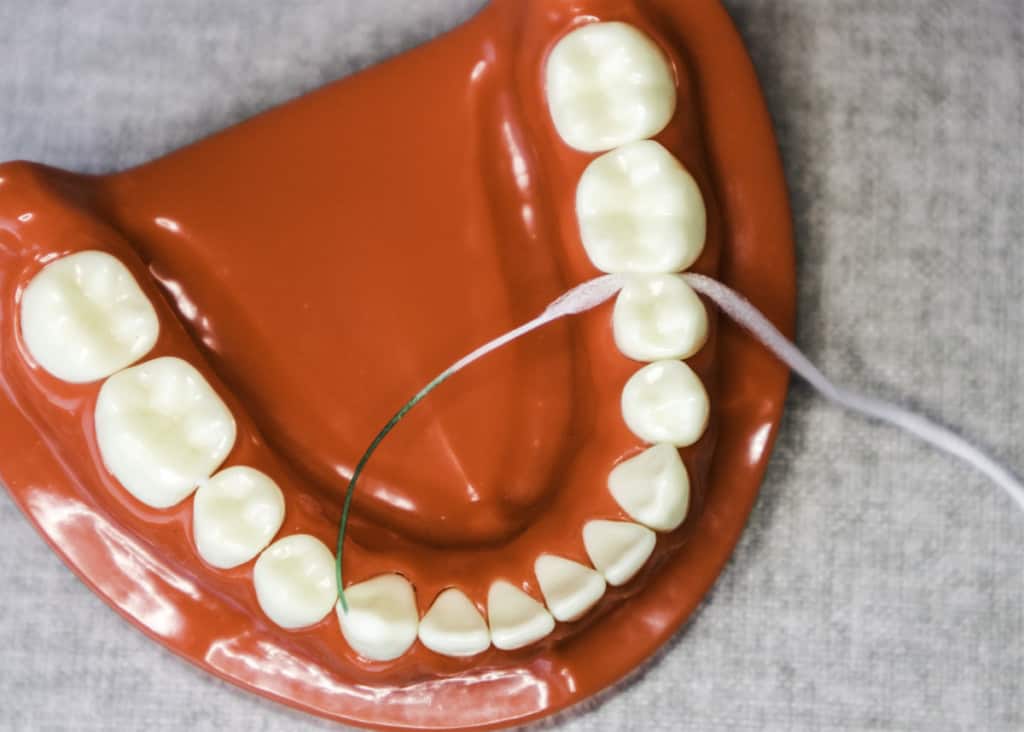
How to clean dental implants with expanding floss
Expanding floss/spongy floss is key to maintaining the health of the tissues around implants. Because of its thicker diameter and spongy texture, it’s ideal for larger spaces and the perfect tool for dental implants.
I do not recommend using standard dental floss around implants because it is too thin.
You use expanding floss the same way you would use regular floss. However, because the implant posts are pretty small in diameter, you will want to try and wrap the floss as much as you can around the implant to allow it to go farther underneath the gumline.

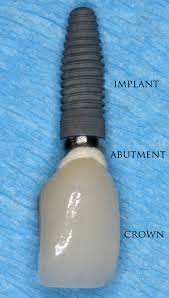
Picture the crown of the implant as the leaves/branches of a tree and the trunk is the implant post/abutment. The implant crown is very wide compared to the implant post/abutment.
This is why spongy floss is so effective because it fills that space much better than standard dental floss.
Once the floss is around the implant, you will want to guide the floss up and down along the implant (from crown to root/top to bottom direction) a few times. Then remove the floss and go to the next area.
Read now: Floss like a Dental Hygienist; How to String Floss; Steps of Use With Pictures
The best spongy floss on the market is Superfloss (Amazon link).
You can find the link to the Superfloss that I recommend to my patients on my implant resource page or click the image below. 🙂
The more you wrap the floss around the implant, the farther down it will go under the gum line, and the more surface area you will clean.
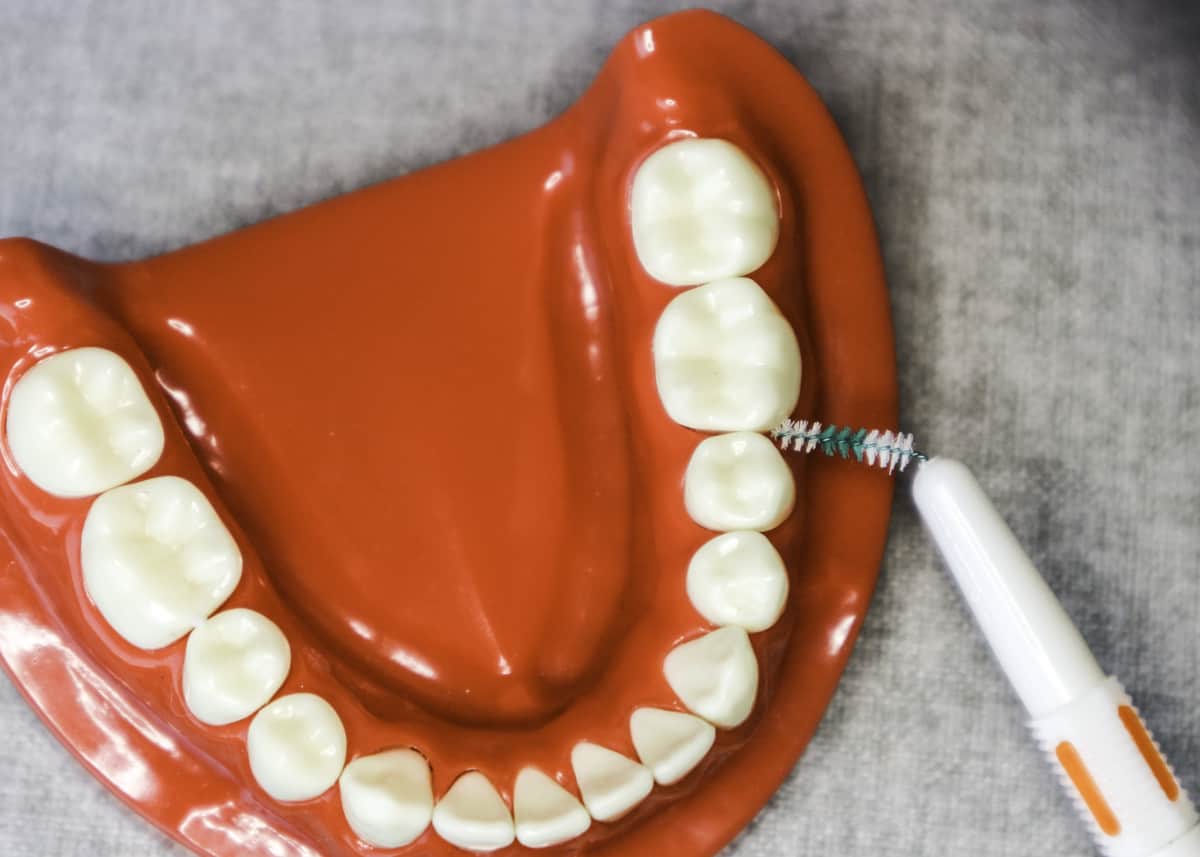
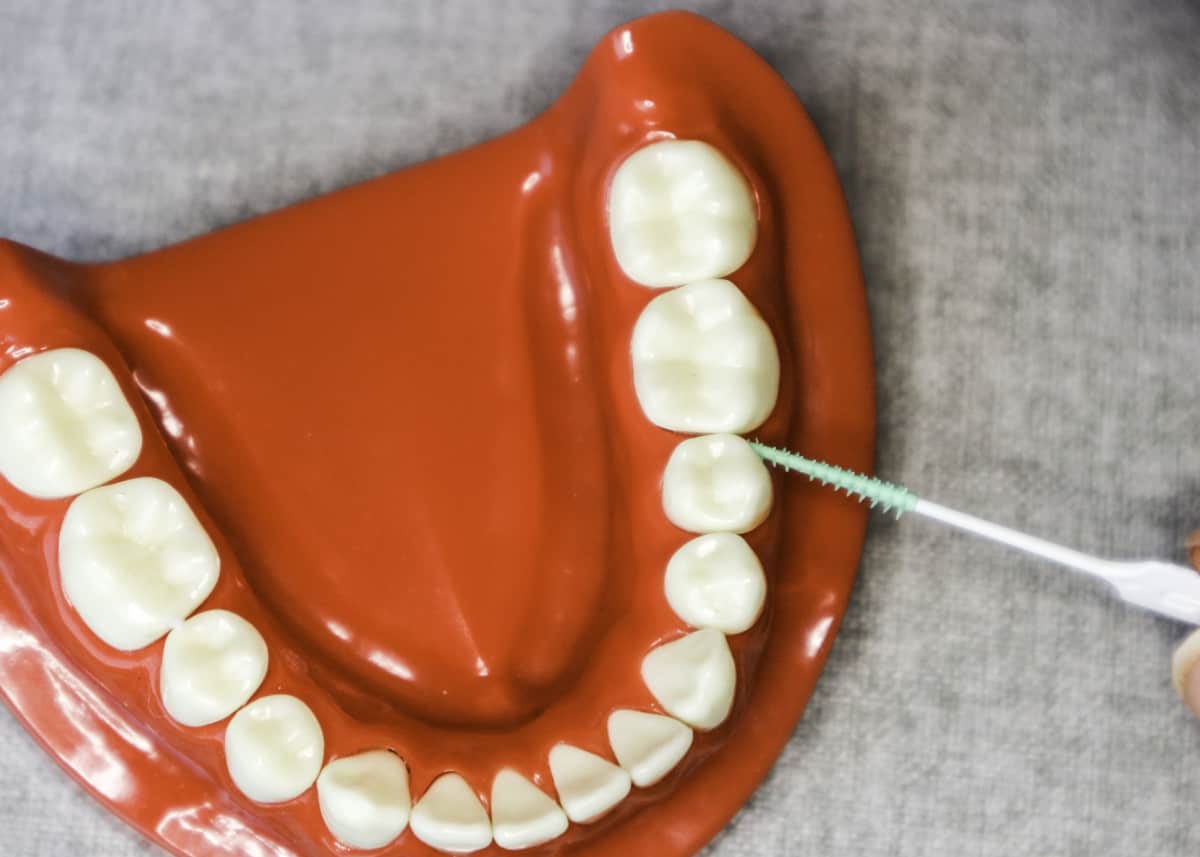
How to clean dental implants with proxabrush
I’m always wary of recommending proxabrushes to my implant patients or on here because you have to be so careful of them and make sure you are buying the right ones.
Most proxabrushes use plain metal wire to hold in all the bristles, and this metal wire can scratch the implant post, resulting in the perfect home for the bacteria that contribute to gum disease.
The only proxabrushes I will EVER recommend to my patients are the GUM proxabrushes.
And why are they the only ones I will ever recommend? Because the metal wire is coated so it won’t scratch the implants.
You can find the GUM proxabrush linked below, and you can choose between different sizes, depending on the amount of space you have. I would start with a smaller one because using one that is too large can damage the gum tissue surrounding the implant.
So you have the GUM coated proxabrush, and you are ready to use it! You want to insert it between the teeth, and use a gentle in and out motion. Check the brush to see if there is any food or plaque debris and rinse it off with water and repeat the process until the brush comes out clean.
It is SO important to make sure you are using a quality product. This is an instance where trying to save a little bit of money can have a huge negative repercussion that causes a lot of money in the long run.
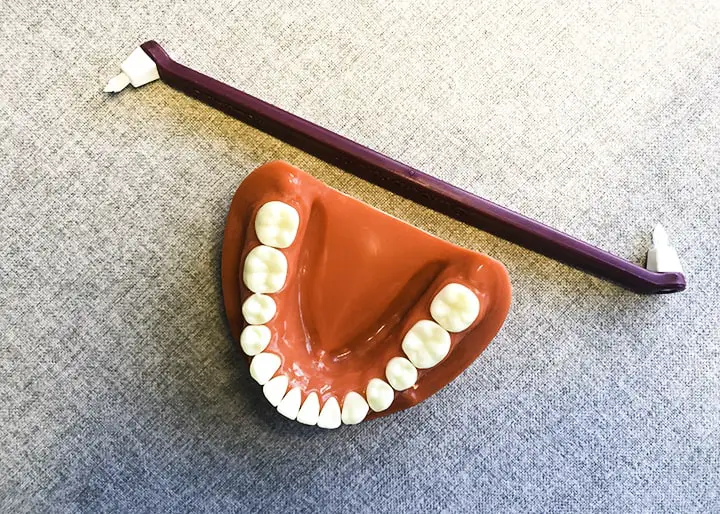
How to clean dental implants with Sulcabrush
The Sulcabrush is a very highly sought-after tool for my patients. And being proudly Canadian, they are made in Canada!
The Sulcabrush has two ends, and each end indicates what side of the tooth it cleans, inside (palate/tongue side) and outside (cheek side). You can see how the Sulcabrush indicates what side to use where. Don’t mind, my little kitty. She loves the Sulcabrush!
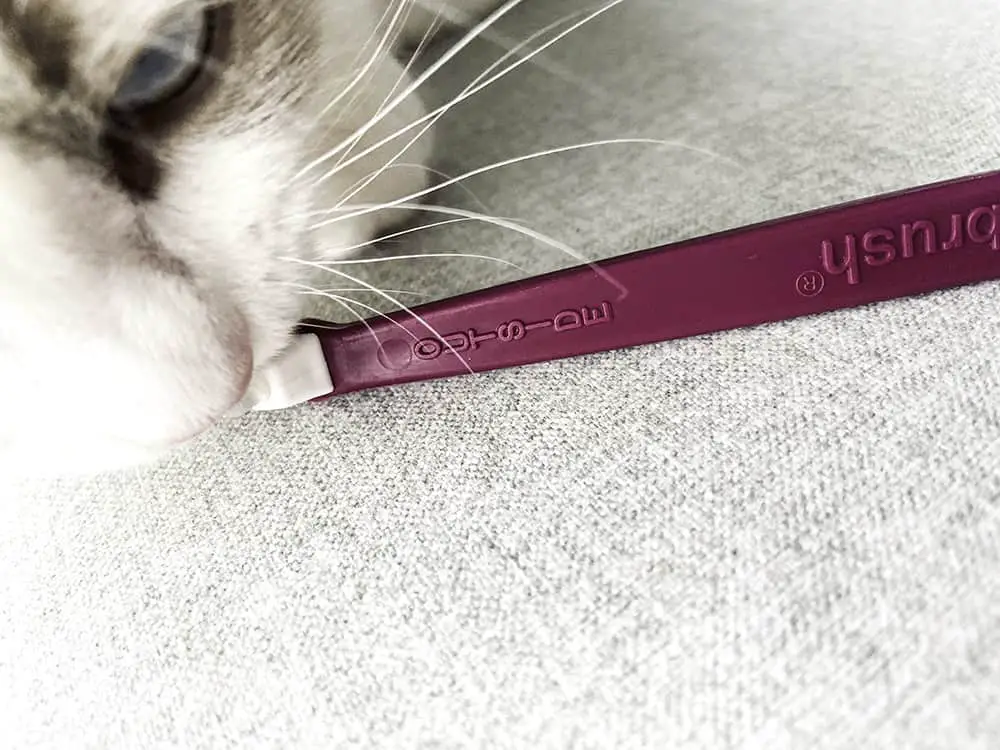
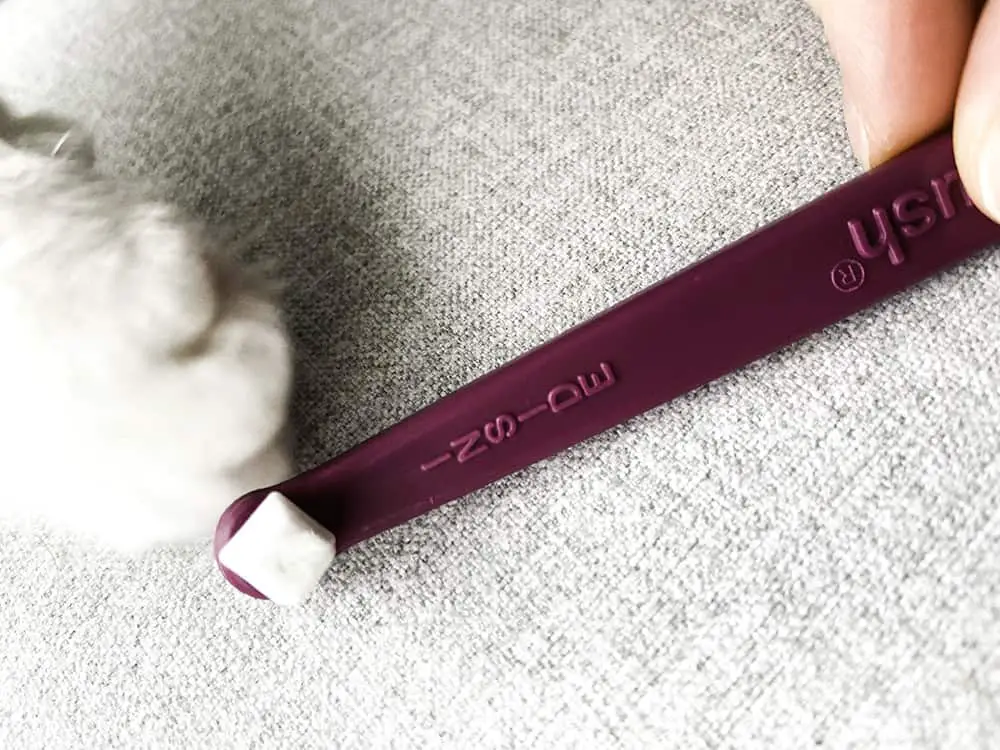
You will want to angle the Sulcabrush at a 45-degree angle toward the gumline and touch the bristles to the gum line. You then want to move the bristles along the gumline in a sweeping motion. Once you reach the area between the teeth, you want to add in some circular motions.
If you want further info on Sulcabrush, here is the link to their website! And below is the link to Amazon to purchase!
They also sell refills to reduce waste!
How to clean dental implants with an end tuft brush
An end tuft brush is like a large Sulcabrush. I prefer the Sulcabrush over the end tuft brush for a few reasons.
The Sulcabrush is more precise and has specifically tailored ends for the different surfaces of the teeth (outside and inside), which the end tuft brush does not have. The angled ends of the Sulcabrush allow for better plaque and food removal.
The end-tuft brush is used the same way as the Sulcabrush, using a sweeping motion and small circular motions between the teeth.
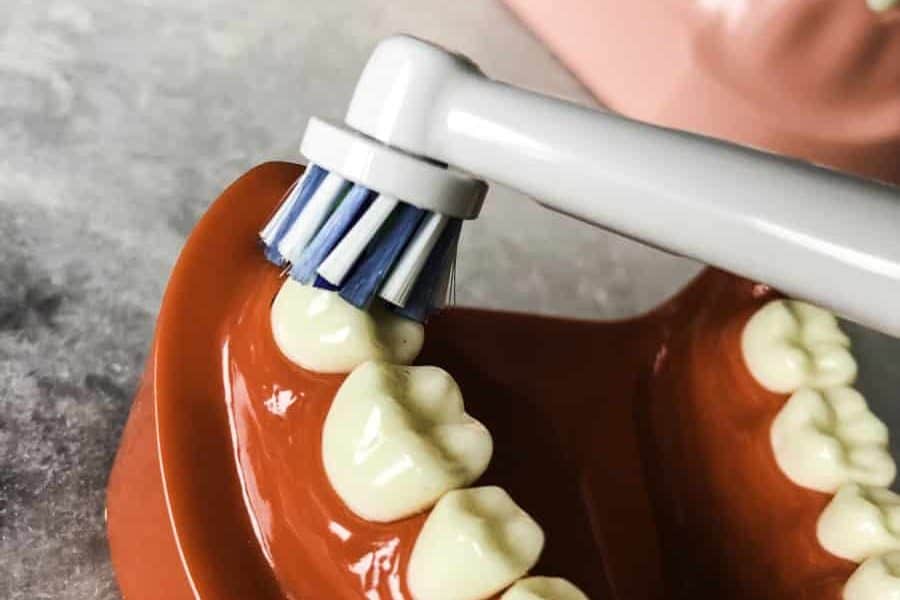
How to clean dental implants with an electric toothbrush
You brush your dental implants the same way you would brush your natural teeth with the electric toothbrush. However, with dental implants, your gumline may differ from your other teeth, so make sure the brush is on the gumline!
But did you know that most people are not using their electric toothbrush correctly?
Make sure you’re using your electric toothbrush correctly by reading the link below that I wrote!
Read Now: The Correct Way to Use an Oral-B Electric Toothbrush
How to clean dental implants with Softpicks
You clean your dental implant with soft picks in the same manner as the proxabrushes. You will want to gently insert the soft pick in-between your teeth and go in and out a few times to push/remove any food debris or plaque.
Dental implant health: Importance of regular hygiene appointments
Our job and passion are for our patients to achieve optimal oral health that is free of disease. We are specifically trained in the health of the oral tissues.
The plaque and food debris that accumulates on your teeth can be removed by flossing and brushing.
But over time, the bacteria that are on the teeth will calcify from the minerals in our saliva and foods/drinks. We call this calculus in the dental world but mostly everyone knows it as tartar.
Calculus/tartar is like cement on the teeth and cannot be removed by flossing and brushing. And PLEASE do not try and remove it yourself. There are specific things that go into cleaning your teeth that we dental hygienists are professionally trained in.
When we remove the build-up and reduce the number of bacteria in and around the teeth/gums/mouth, it allows the body time to heal. Regular dental hygiene appointments are critical for the longevity of your teeth and oral health.
Read Now: How Dental Hygienists Clean Your Teeth
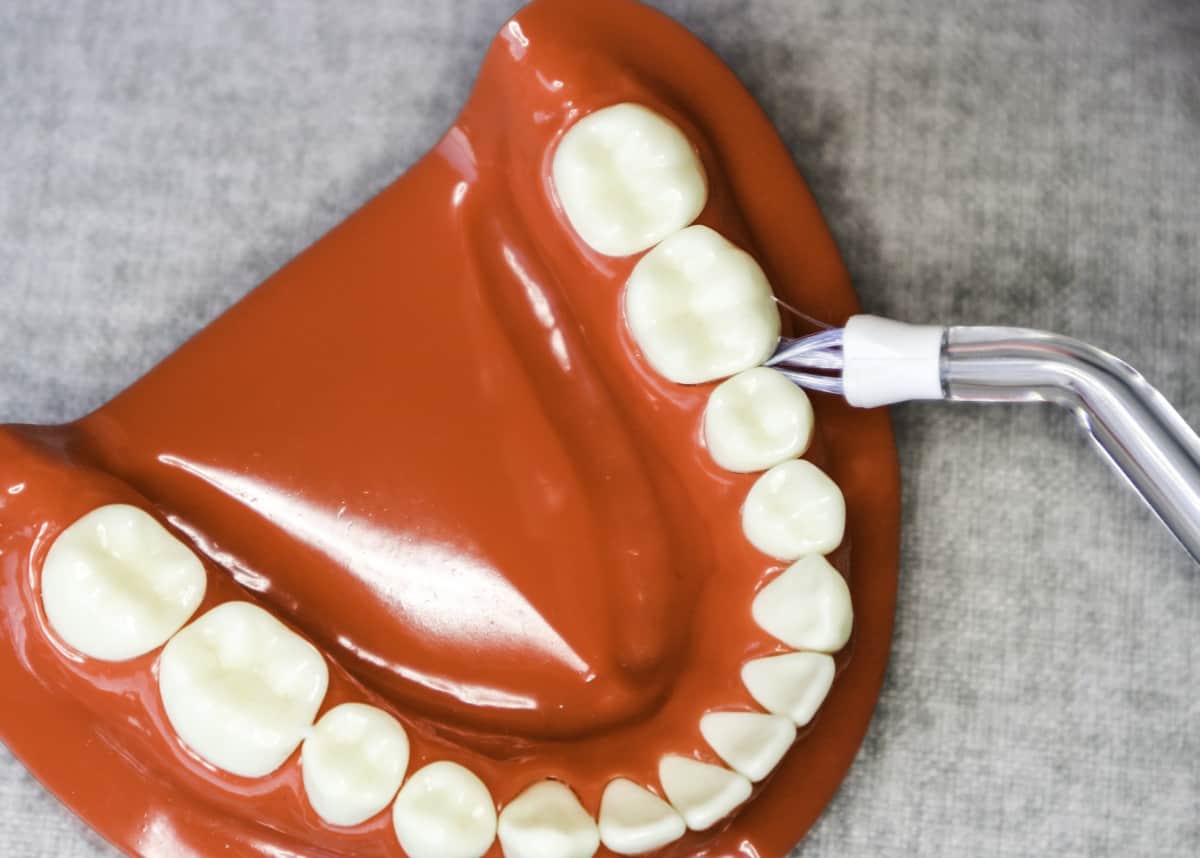
How dental hygienists clean dental implants
We dental hygienists clean dental implants with different instruments than what we would use on regular/natural teeth. We forego the traditional metal scalers and use either resin/plastic or titanium instruments.
We must use the right tools because if we do not, we could scratch the implant. Like I mentioned earlier in this post, that will make a nice home for the bacteria and can contribute to inflammation around the implant.
If you want to see all the tools/gadgets I give and recommend to patients, click the link below 🙂
Read Now: Bridge and Implant Care Resources
I hope this information has helped you in some way!
Have a wonderful day,
Holly 🙂
